标签 WordPress技巧 下的文章

折腾主题会经常见到wordpress的头部多了很多没有用的信息,比如wordpress版权、wordpress RSS、外部博客接口、短链接网址、wordpress自带脚本等。

对于一个折腾主题的爱好者,这些东西可是不允许存在的,我上网搜了一下,其实这一切都是wordpress的wp_head() 在作怪了。下面与大家分享怎么移除这些内容。

大家根据需要移除不需要的函数就可以了。

<?php //remove_action( 'wp_head', 'wp_enqueue_scripts', 1 ); remove_action( 'wp_head', 'feed_links', 2 ); remove_action( 'wp_head', 'feed_links_extra', 3 ); remove_action( 'wp_head', 'rsd_link' ); remove_action( 'wp_head', 'wlwmanifest_link' ); remove_action( 'wp_head', 'index_rel_link' ); remove_action('wp_head', 'parent_post_rel_link', 10, 0 ); remove_action('wp_head', 'start_post_rel_link', 10, 0 ); remove_action( 'wp_head', 'adjacent_posts_rel_link_wp_head', 10, 0 ); //remove_action( 'wp_head', 'locale_stylesheet' ); remove_action( 'publish_future_post', 'check_and_publish_future_post',10, 1 ); //remove_action( 'wp_head', 'noindex', 1 ); //remove_action( 'wp_head', 'wp_print_styles', 8 ); //remove_action( 'wp_head', 'wp_print_head_scripts', 9 ); remove_action( 'wp_head', 'wp_generator' ); //remove_action( 'wp_head', 'rel_canonical' ); remove_action( 'wp_footer', 'wp_print_footer_scripts' ); remove_action( 'wp_head', 'wp_shortlink_wp_head', 10, 0 ); remove_action( 'template_redirect', 'wp_shortlink_header', 11, 0 ); add_action('widgets_init', 'my_remove_recent_comments_style'); function my_remove_recent_comments_style() { global $wp_widget_factory; remove_action('wp_head', array($wp_widget_factory->widgets['WP_Widget_Recent_Comments'] ,'recent_comments_style')); } ?>
下面说说具体使用和作用

1、移除WordPress版本

在head区域,可以看到如下代码:

<meta name="generator" content="WordPress 3.1.2" />

这是隐性显示的WordPress版本信息,默认添加。可以被黑客利用,攻击特定版本的WordPress漏洞。清除代码:

remove_action( 'wp_head', 'wp_generator' );

2、移除离线编辑器开放接口

remove_action( 'wp_head', 'rsd_link' ); remove_action( 'wp_head', 'wlwmanifest_link' );

3、移除前后文、第一篇文章、主页meta信息

remove_action( 'wp_head', 'index_rel_link' ); // Removes the index link remove_action( 'wp_head', 'parent_post_rel_link', 10, 0 ); // Removes the prev link remove_action( 'wp_head', 'start_post_rel_link', 10, 0 ); // Removes the start link remove_action( 'wp_head', 'adjacent_posts_rel_link_wp_head', 10, 0 ); // Removes the relational links for the posts adjacent to the current post.

4、移除feed

remove_action( 'wp_head', 'feed_links', 2 );
remove_action( 'wp_head', 'feed_links_extra', 3 );

最后我的效果图,去的还算干净:
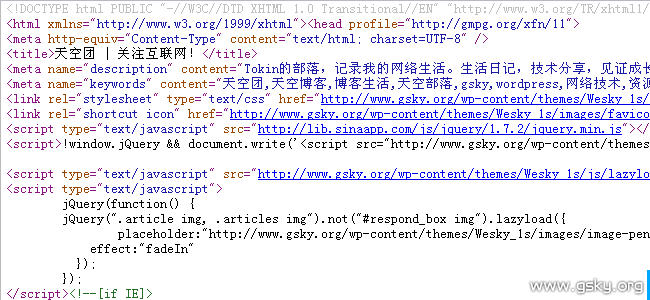
到这里你的头部也就干净了。话说还可以移除一个3.0以后添加的js,不过看了一下,只有在本地那个代码才会出现,所以就没必要了,如果你有什么要补充的,欢迎留言。

文章整编自:主题吧
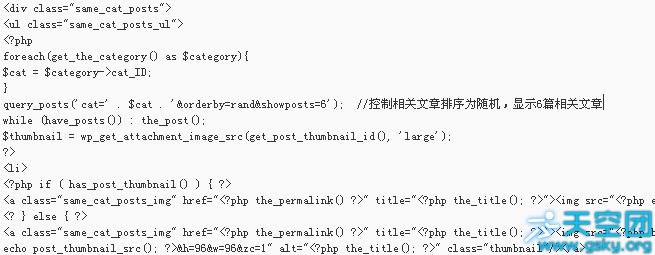
无觅的相关文章效果相信很多朋友都非常喜欢,而且效果很棒,但是它每次访问相关文章的时候,并不是直接访问的文章对应链接,而是通过跳转的方式,虽然效果没什么不通过,但是总觉得别扭,于是搜索代码中~~~

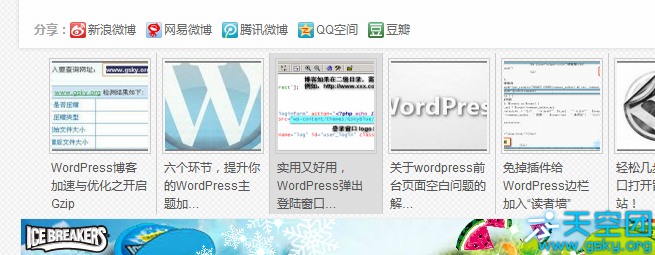
百度结果中,有不少结果,经过我测试使用,我只成功使用了来自Kayosite提供的代码,效果和无觅非常相似,经过我的一番调整和增强,我已经深深爱上了它,于是不敢独享,拿出来分享一下。

其实效果非常简单,首先将下方代码粘贴到 文章页面 模板的合适位置

<div class="same_cat_posts"> <h3>猜你喜欢</h3> <ul class="same_cat_posts_ul">

<?php foreach(get_the_category() as $category){ $cat = $category->cat_ID; } query_posts('cat=' . $cat . '&orderby=rand&showposts=6'); //控制相关文章排序为随机,显示6篇相关文章 while (have_posts()) : the_post(); $thumbnail = wp_get_attachment_image_src(get_post_thumbnail_id(), 'large'); ?> <li> <?php if ( has_post_thumbnail() ) { ?> <a class="same_cat_posts_img" href="<?php the_permalink() ?>" title="<?php the_title(); ?>"><img src="<?php echo catch_first_image() ?>" alt="<?php the_title(); ?>" /></a> <? } else { ?> <a class="same_cat_posts_img" href="<?php the_permalink() ?>" title="<?php the_title(); ?>"><img src="<?php echo post_thumbnail_src(); ?>&h=96&w=96&zc=1" alt="<?php the_title(); ?>" class="thumbnail"/></a> <? } ?> <p class="same_cat_posts_tittle"><a href="<?php the_permalink(); ?>" title="<?php the_title(); ?>"><?php echo mb_strimwidth(get_the_title(), 0, 35, '…'); ?></a></p> </li> <?php endwhile; wp_reset_query(); ?> </ul> </div>

然后添加CSS

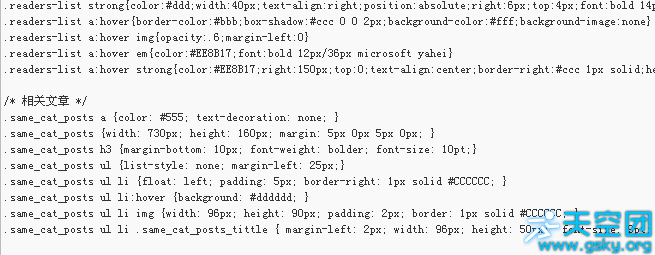
/* 相关文章 */ .same_cat_posts a {color: #555; text-decoration: none; } .same_cat_posts {width: 730px; height: 160px; margin: 5px 0px 5px 0px; } .same_cat_posts h3 {margin-bottom: 10px; font-weight: bolder; font-size: 10pt;} .same_cat_posts ul {list-style: none; margin-left: 25px;} .same_cat_posts ul li {float: left; padding: 5px; border-right: 1px solid #CCCCCC; } .same_cat_posts ul li:hover {background: #dddddd; } .same_cat_posts ul li img {width: 96px; height: 90px; padding: 2px; border: 1px solid #CCCCCC; } .same_cat_posts ul li .same_cat_posts_tittle { margin-left: 2px; width: 96px; height: 50px; font-size: 9pt; text-decoration: none; }

这里特别注意的是CSS,你需要调整!仿 无觅 效果是否相似,CSS决定一切

经过上方操作后,下面你需要下载下面的文件,解压并上传到正在使用的主题目录里

点击下载 | 备用下载1备用下载2

上传后,将cache文件夹的权限设置为777

好啦,完场上方操作后,刷新一下你文章页面,是不是有效果了呢?

WordPress中文版发布文章的时候,会自动地将文章里面的所有英文引号换成中文的,还有英文的3个句号也会变成中文的省略号。在粘贴一些代码的时候,英文引号这个问题那是相当的蛋疼。所以百度了几下,代码找到,留做备份,方便升级后我再修改。

解决方法:

1、打开WordPress安装目录下的/wp-includes/formatting.php,找到以下代码。(3.1版本的是第79行开始)

// static strings

$curl = str_replace($static_characters, $static_replacements, $curl);

// regular expressions

$curl = preg_replace($dynamic_characters, $dynamic_replacements, $curl);

2、把这段代码删除或注释掉就OK啦,你会发现原来那些中文引号又自动变回英文啦。


这个方法比较笨,但是真的是可以有效解决,不过如果你升级了wordpress,可能需要再修改一次。

话说什么不懂得就要百度一下,读者墙这个功能貌似很多主题都有,既然折腾了,也不差它一个,所以顺手就把读者墙这个功能给剽窃来了,嘎嘎

以下是我找到的代码,你可以直接用到你的WordPress主题中,如放在sidebar.php中,实现侧边栏“30最活跃的读者”,注意修改后用UTF-8编码保存,否则中文可能会乱码:

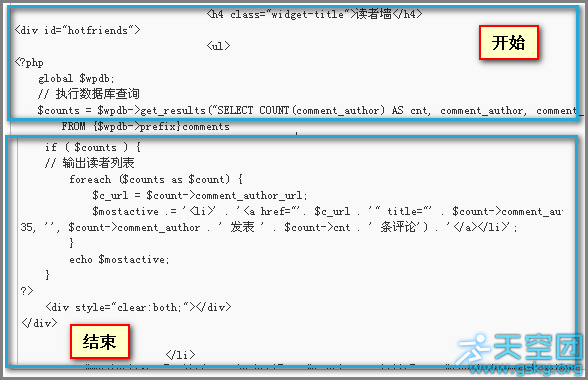
<div id="hotfriends"> <h3>30天内最活跃的读者</h3> <ul> <?php /** * WordPress制作读者评论排行榜 * @author: Ludou * @Blog  : http://www.ludou.org/ */

global $wpdb; // 执行数据库查询 $counts = $wpdb->get_results("SELECT COUNT(comment_author) AS cnt, comment_author, comment_author_url, comment_author_email FROM {$wpdb->prefix}comments WHERE comment_date > date_sub( NOW(), INTERVAL 1 MONTH ) AND comment_approved = '1' AND comment_author_email != 'example@example.com' AND comment_author_url != '' AND comment_type = '' AND user_id = '0' GROUP BY comment_author_email ORDER BY cnt DESC LIMIT 15");

$mostactive = ''; if ( $counts ) { // 输出读者列表 foreach ($counts as $count) { $c_url = $count->comment_author_url; $mostactive .= '<li>' . '<a href="'. $c_url . '" title="' . $count->comment_author .' 发表 '. $count->cnt . ' 条评论" target="_blank">' . get_avatar($count->comment_author_email, 55, '', $count->comment_author . ' 发表 ' . $count->cnt . ' 条评论') . '</a></li>'; } echo $mostactive; } ?> <div style="clear:both;"></div> </ul> </div>

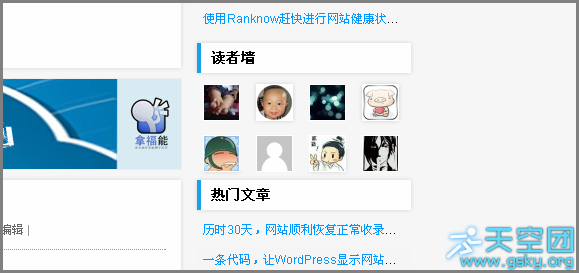
当然,实际应用的时候,你必须要有所改动的添加,比如我添加的效果如下:

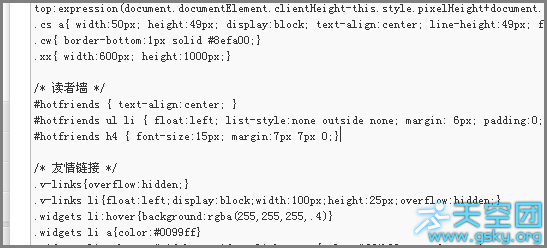
正确贴入后,下一步你需要做的就是加入css,复制到主题目录下的style.css中即可,你可以根据需要做些更改:

#hotfriends { text-align:center; } #hotfriends ul li { float:left; list-style:none outside none; margin: 6px; padding:0;} #hotfriends h4 { font-size:15px; margin:7px 7px 0;}

一切都结束了,刷新一下你的网页看看效果如何:

本文代码来自http://www.ludou.org/most-active-readers.html,如果您使用过程中有什么不明白的地方,请前去作者也查看详细注释

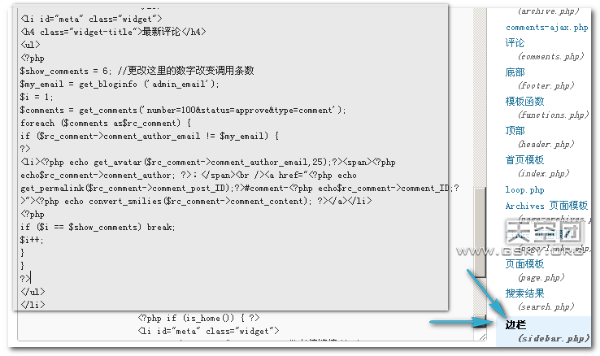
今天是折腾主题的第四天,主题的边栏默认仅仅只有“归档”和“功能”,当然,主题也是支持小工具的,不过小工具并无法实现我想要的“最新评论”效果,不显示平均头像也就算了,竟然还不显示评论内容,我无法淡定了,不用插件,所以只能用代码解决了! 百度了几下,发现实现最新评论的效果还挺多,主要有四种,我不一一列举了,找个一个我最喜欢也是我正在用的代码,贴出来,留做记录,方便以后查看,代码如下:

<li id="meta" class="widget"> <h4 class="widget-title">最新评论</h4> <ul> <?php $show_comments = 6; //更改这里的数字改变调用条数 $my_email = get_bloginfo ('admin_email'); $i = 1; $comments = get_comments('number=100&status=approve&type=comment'); foreach ($comments as$rc_comment) { if ($rc_comment->comment_author_email != $my_email) { ?> <li><?php echo get_avatar($rc_comment->comment_author_email,25);?><span><?php echo$rc_comment->comment_author; ?>:</span><br /><a href="<?php echo get_permalink($rc_comment->comment_post_ID);?>#comment-<?php echo$rc_comment->comment_ID;?>"><?php echo convert_smilies($rc_comment->comment_content); ?></a></li> <?php if ($i == $show_comments) break; $i++; } } ?> </ul> </li>
将上方代码放到你主题下sidebar.php的特定位置即可,效果就在我博客边栏

当然你要适当的修改 <h4 class="widget-title">最新评论</h4> 不同的主题有不同的值,你参照主题的来就ok了

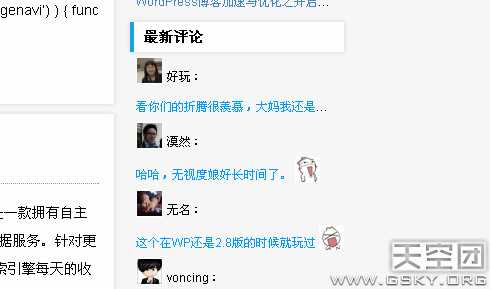
修改保存后的效果如下:

好啦,这个功能我也给解决了,下一步向“读者墙”功能迈进! &代码来源于网络,如果您在使用过程中因个人操作失误,或贴放代码不正确造成的一切后果概不负责,请修改前备份文件。